An essential task in any server is the automation of backup tasks. Individual copies can be made from client accounts, but if we are using Cpanel we can take advantage of one of its latest additions to create a complete backup of the system and host it periodically in Amazon Web Services. Let’s see the steps to configure the process.
1. Create a Bucket in Amazon S3
We are going to use the Amazon S3 file hosting service. We need to identify ourselves in the panel

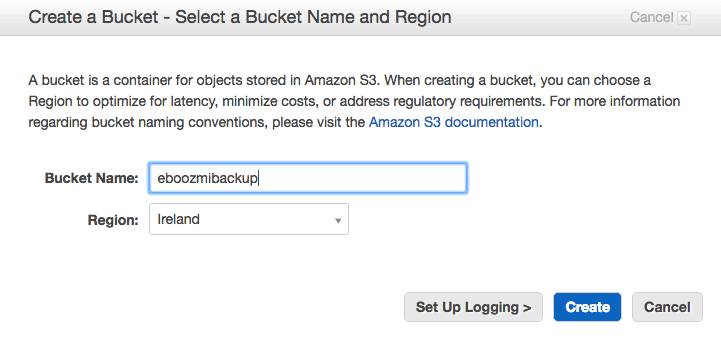
Click on create new bucket and indicate the name. We must also specify the region where we will locate the files, remembering that if we select Ireland we ensure that we comply with European data law. We should not use capital letters or spaces in the Bucket name.
2. Configure Backups in Cpanel
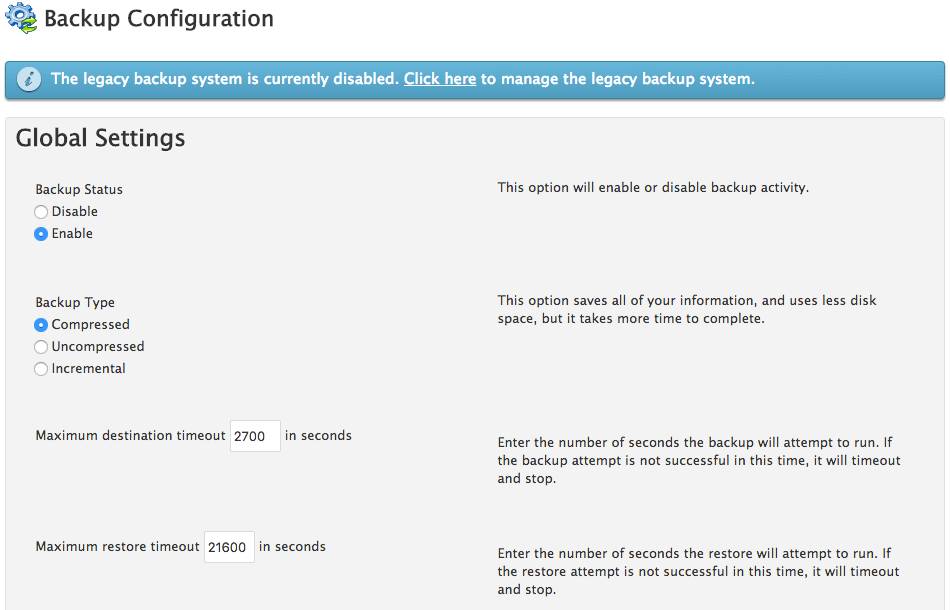
later it is necessary to configure the backups in Cpanel WHM with the newly created Amazon S3 bucket. We enter WHM, Backup option, and we will find an options panel. The first thing is to activate the backup option and indicate if we want compressed, uncompressed or incremental backups, in which only the files that have been modified since the previous copy are copied.
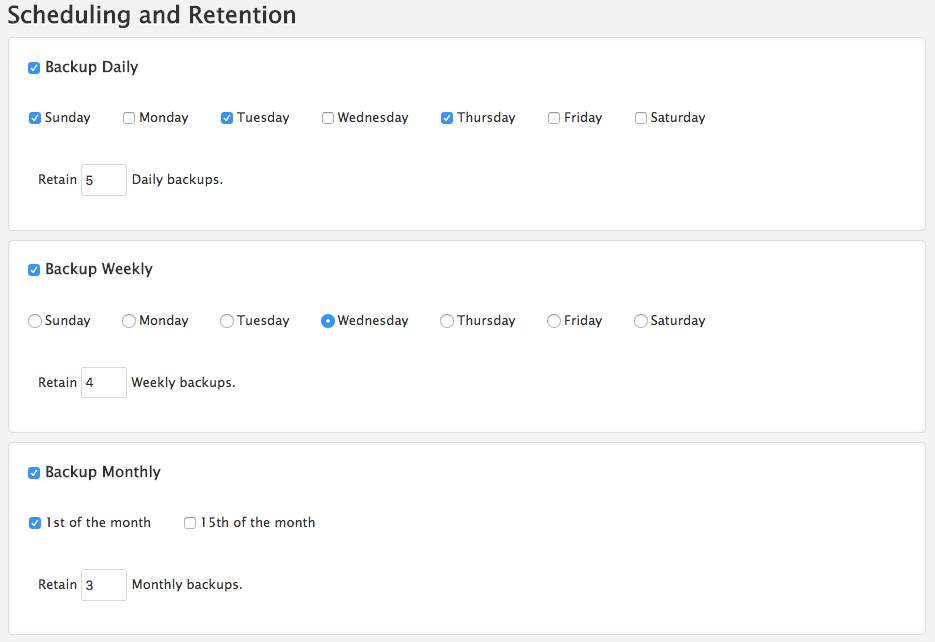
Then we select the frequency of the backups, which can be daily, weekly, monthly or a combination of these.
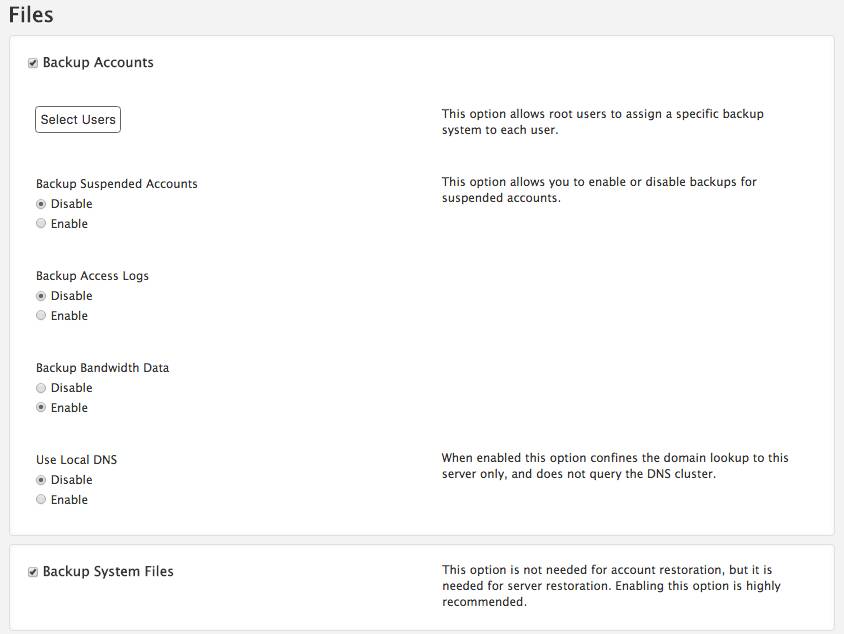
El siguiente paso es seleccionar las cuentas de usuario de las que queremos mantener las copias de seguridad. Another very interesting option is to make a backup of the system files, which will allow us to recover the entire system in the event of a disaster.
3. Connection with Amazon S3
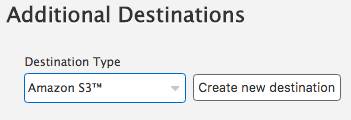
The last step is to connect WHM to Amazon S3. Select this option and click on Create New Destination
We indicate the name we want for the destination, the folder and the destination bucket in Amazon S3, as well as the login data in the system, the Access Key ID and the Secret Access Key.
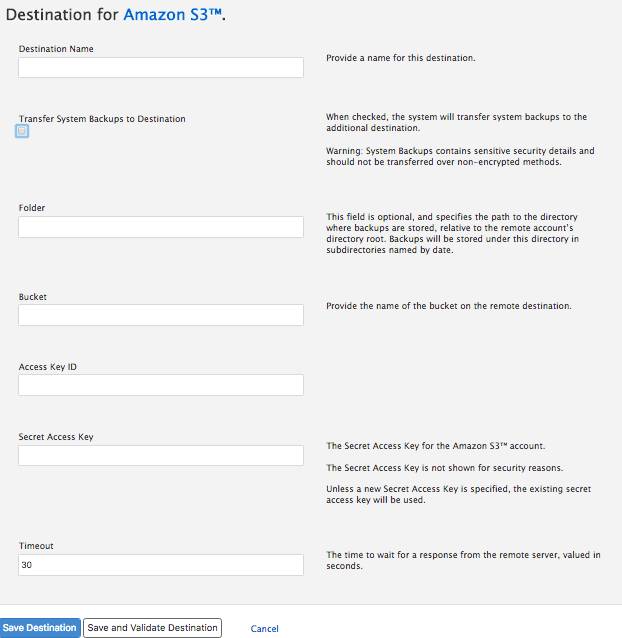
Both keys can be set here.
To finish, click on Save and Validate Destination. The backup has been configured in the system, and we can hit the validate button to check that everything is ok.
The backups will begin to upload from WHM to Amazon S3 according to the frequency that we have indicated. If we do not want to wait, we can force the start with the following command, entering the server with ssh connection as root:
/usr/local/cpanel/bin/backup –force
The command will return the log that is being used for the backup job, something like:
-bash-4.1# /usr/local/cpanel/bin/backup –force
info [backup] Started at Sun Sep 28 12:00:38 2014
info [backup] Process started in background.
info [backup] Log file: /usr/local/cpanel/logs/cpbackup/1411923638.log
In order to see if the process is progressing correctly, we analyze the log with a command like this:
tail -f /usr/local/cpanel/logs/cpbackup/1411920835.log
And the following command can be used to see if the files upload without problems
-bash-4.1# tail -f /usr/local/cpanel/logs/cpbackup_transporter.log
Which will show an output like this
-bash-4.1# tail -f /usr/local/cpanel/logs/cpbackup_transporter.log
[2014-09-28 12:01:43 -0500] info [cpbackup_transporter] cPanel Backup Transporter Queue Daemon started.
[2014-09-28 12:01:43 -0500] info [cpbackup_transporter] cpbackup_transporter – started
[2014-09-28 12:01:43 -0500] info [cpbackup_transporter] cpbackup_transporter – Checking queue for tasks
[2014-09-28 12:01:43 -0500] info [cpbackup_transporter] cpbackup_transporter – Processing next task
[2014-09-28 12:01:43 -0500] info [cpbackup_transporter] Instantiating Object
[2014-09-28 12:01:43 -0500] info [cpbackup_transporter] Starting a \”copy\” operation on the \”Amazon Backup\” destination ID \”rxpoY3vkuP1gI9ZYHemw8abH\”.
[2014-09-28 12:01:43 -0500] info [cpbackup_transporter] Validating destination path /Backups/2014-09-28
[2014-09-28 12:01:44 -0500] info [cpbackup_transporter] Path exists
[2014-09-28 12:01:44 -0500] info [cpbackup_transporter] Uploading /backup/2014-09-28/accounts/cptest2.tar.gz to /Backups/2014-09-28/cptest2.tar.gz
[2014-09-28 12:01:44 -0500] info [cpbackup_transporter] Attempting to upload /backup/2014-09-28/accounts/cptest2.tar.gz to /Backups/2014-09-28/cptest2.tar.gz for destination: Amazon Backup
[2014-09-28 12:01:44 -0500] info [cpbackup_transporter] Upload attempt #1 starting for /backup/2014-09-28/accounts/cptest2.tar.gz to /Backups/2014-09-28/cptest2.tar.gz for destination: Amazon Backup
[2014-09-28 12:01:45 -0500] info [cpbackup_transporter] Successful transfer of /backup/2014-09-28/accounts/cptest2.tar.gz to /Backups/2014-09-28/cptest2.tar.gz for destination Amazon Backup
Once the backup is finished we can enter our administration panel in Amazon S3 and we will see a list of the uploaded files

With this process we will have the possibility of recovering a client’s account or even our entire system quickly and with a reduced storage cost.
