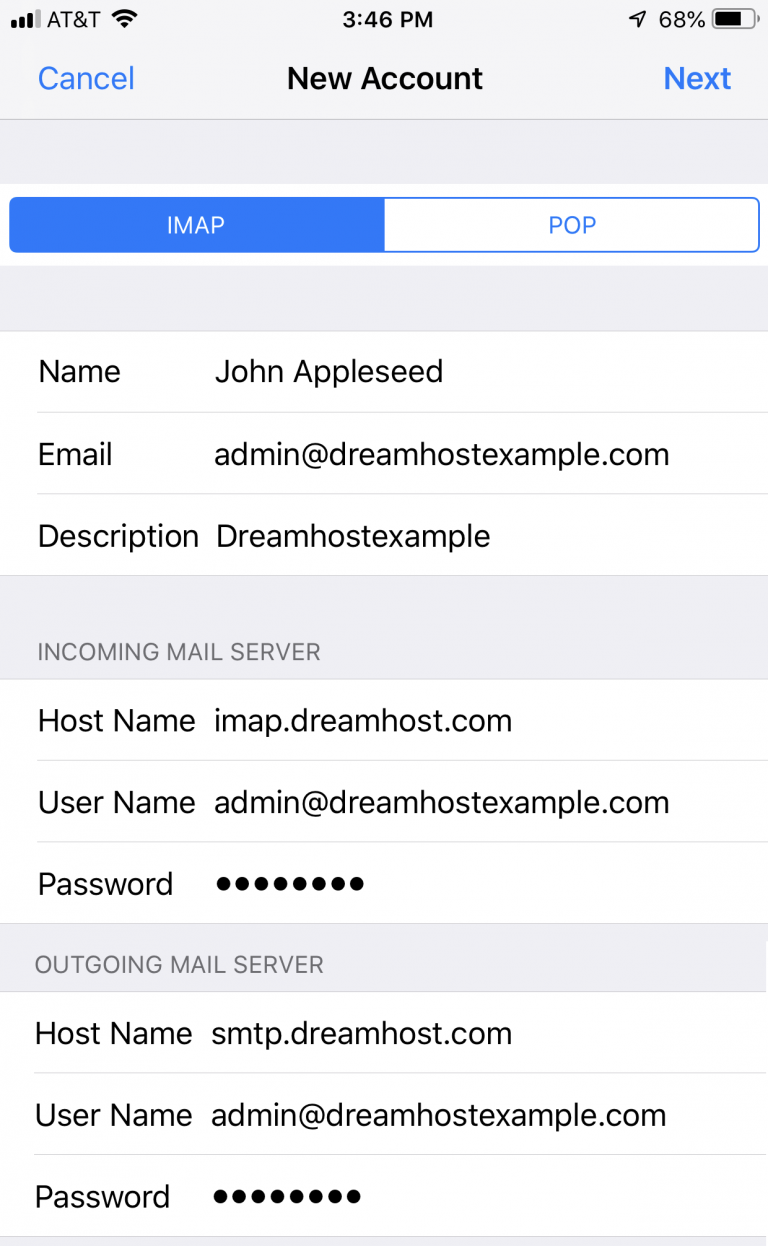
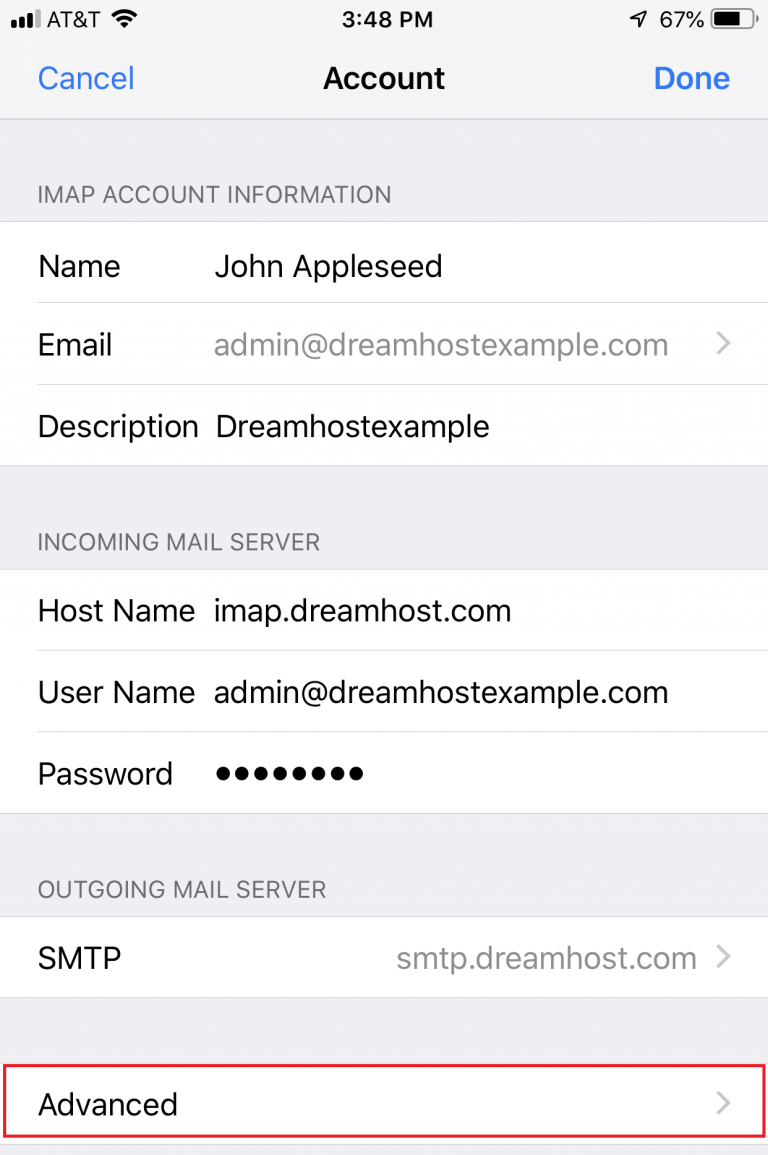
9. Make sure ‘IMAP’ is highlighted, then enter the following information for the INCOMING AND OUTGOING MAIL SERVER:
The email address
‘admin@dreamhostexample.com’ and mail servers ‘imap.dreamhost.com’ and ‘smtp.dreamhost.com’ are shown as examples in the screenshot above. Be sure to enter your real email address and mail servers in these fields.
See Email Client Settings for more information on mail server settings.
INCOMING MAIL SERVER
Host Name – The name of the mail server. This is imap.dreamhost.com or pop.dreamhost.com.
Username : address@example.com (the email address you are accessing).
Password – Password for the email address. If you don’t know what this is, you can request/reset it from the section Manage email from your panel by clicking the Edit button next to the address.
OUTGOING MAIL SERVER
Host Name – The name of the mail server. This is smtp .dreamhost.com.
Username : address@example.com (the email address you are accessing).
Password – Password for the email address. If you don’t know what this is, you can request/reset it from the section Manage email from your panel by clicking the Edit button next to the address.
10.When you are finished entering the new mail server details, tap Next in the upper right corner.
Contact the DreamHost mail server and verify your email account:

4. To view your secure settings, tap ‘Advanced’ towards page 5.Scroll down to view all settings.
It is not recommended to change these values as they should already be configured to use secure settings.
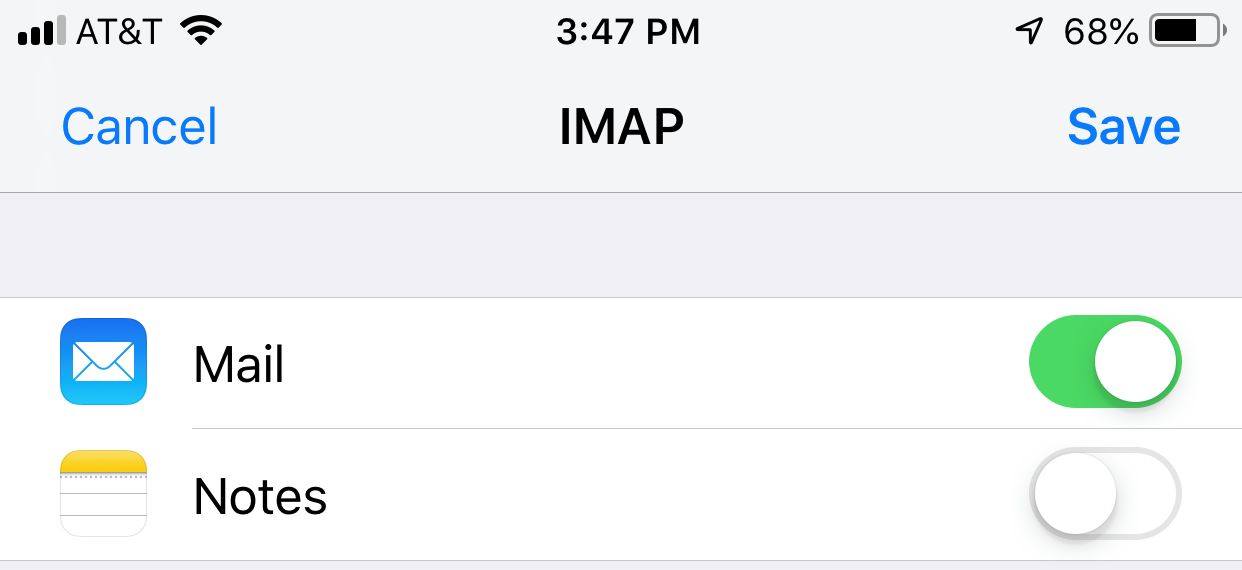
Mailbox Behaviors
Depending on your iPhone iOS version and settings, you may need to adjust the ‘Mailbox Behavior’ settings to ensure that your email appears in the designated folder on the DreamHost mail server. This includes the following folders:
- Drafts
- Issued
- Deleted
- File
The following example describes how to change the settings so that the ‘Sent’ email appears on the DreamHost mail server (instead of on your iPhone):
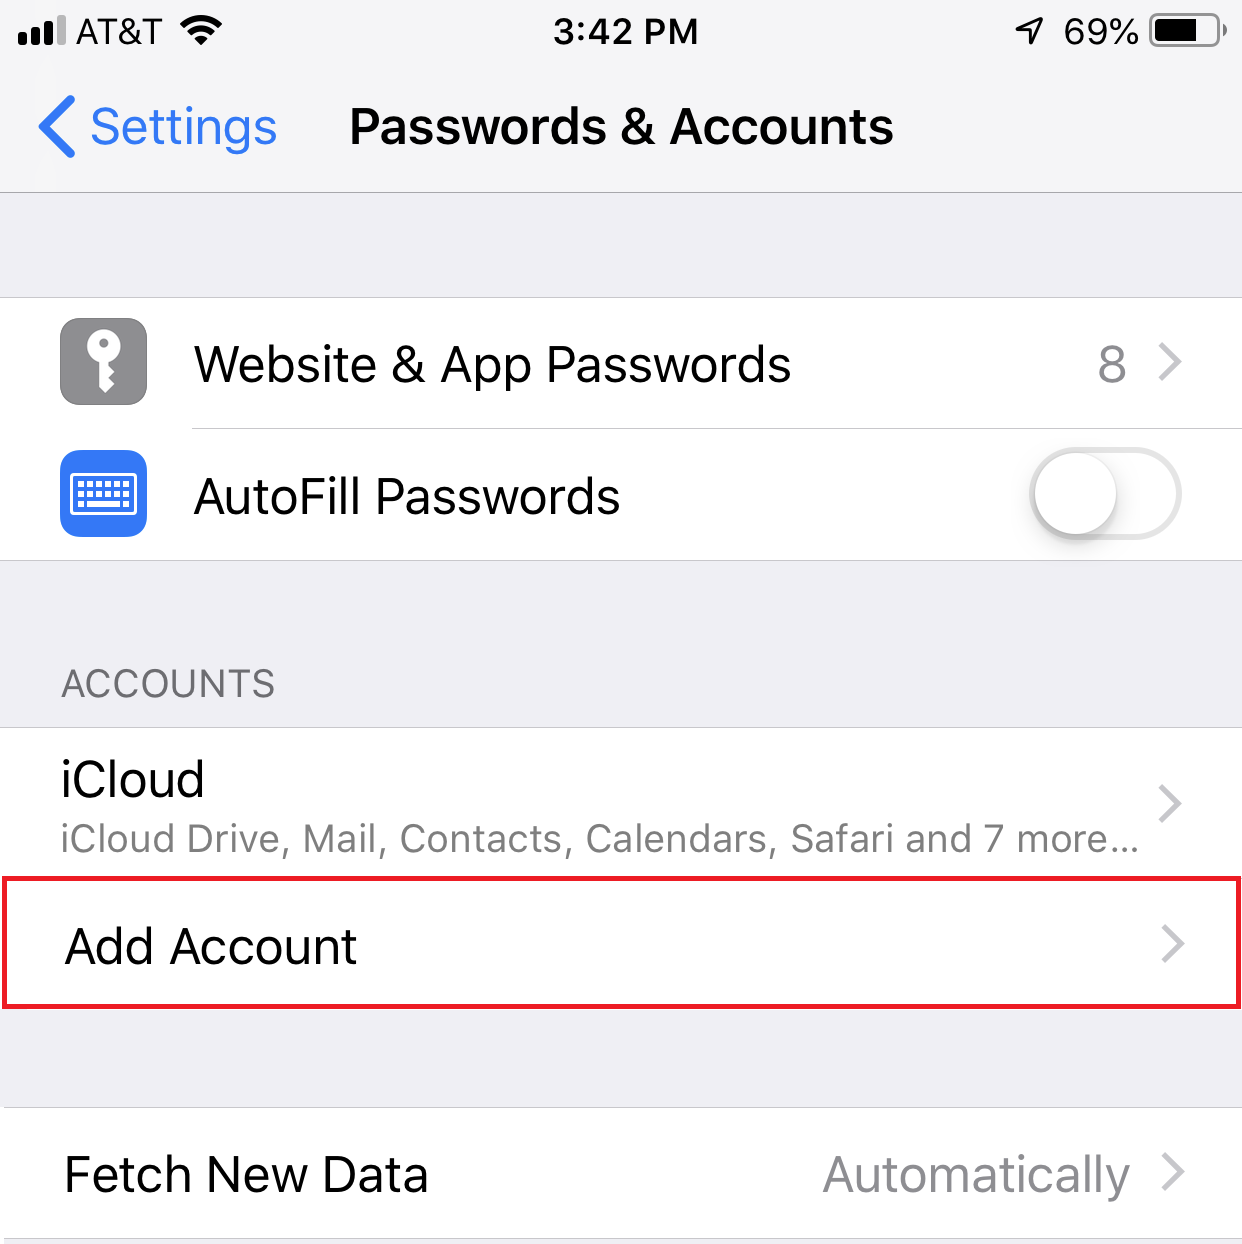
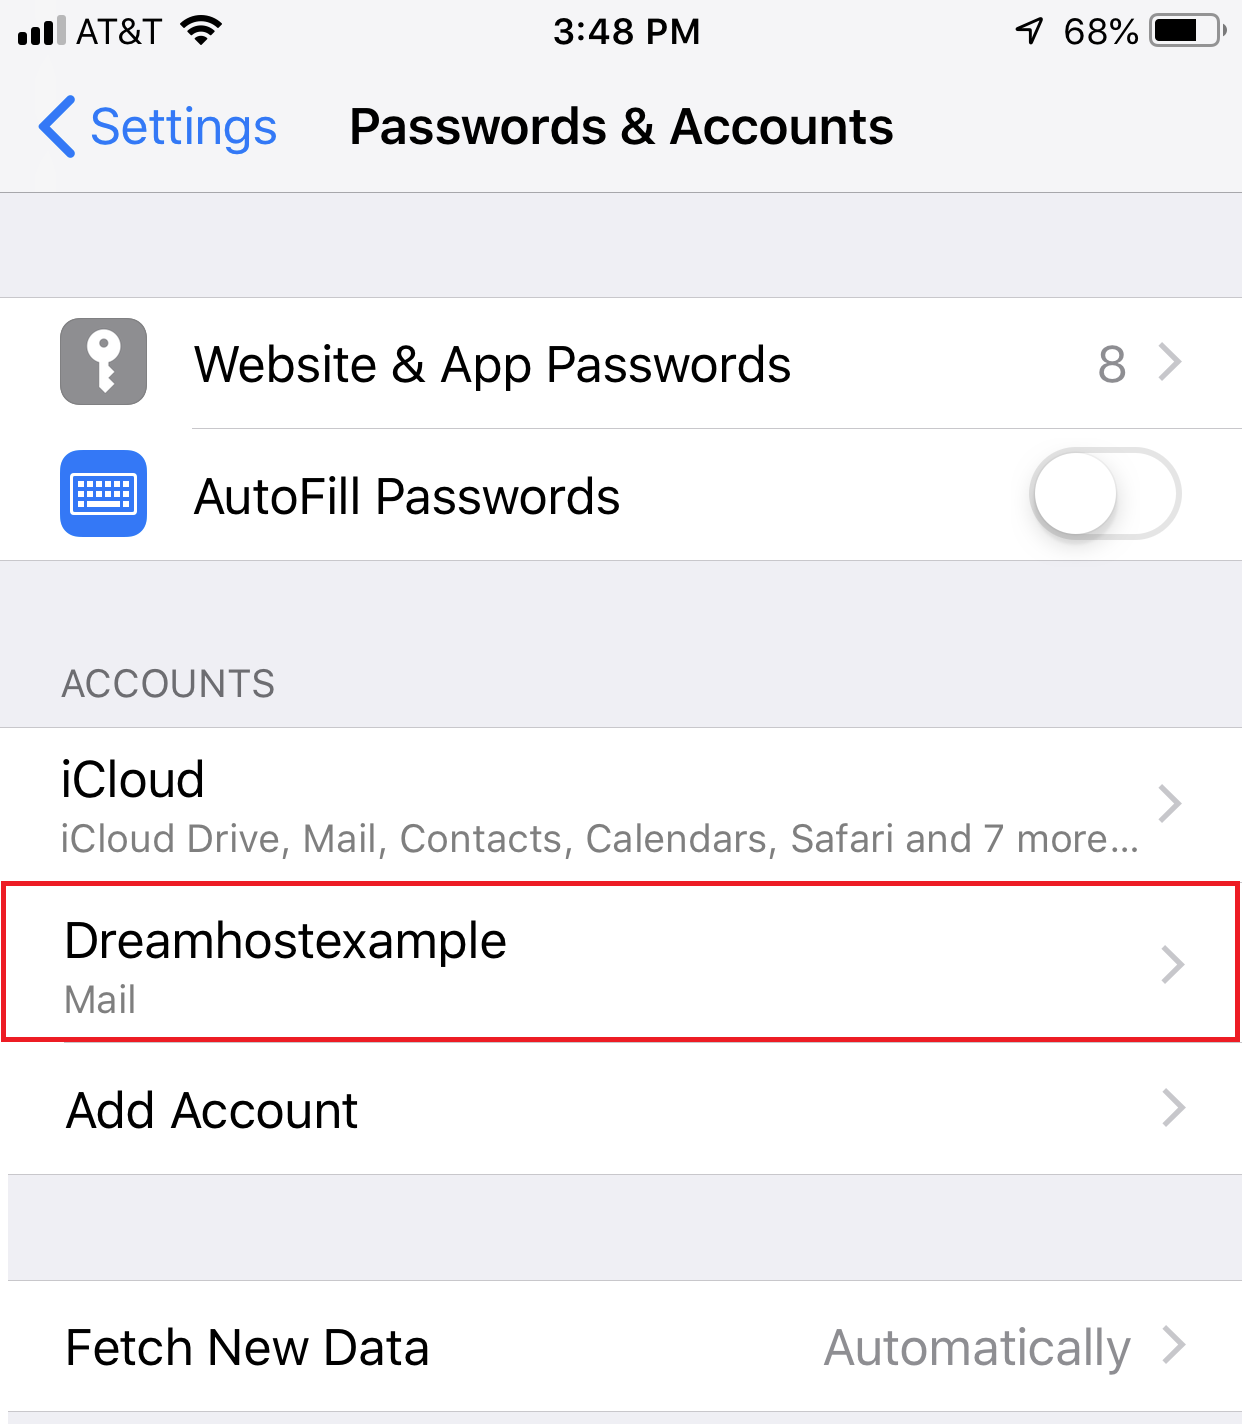
- Go to (Settings > Passwords & Accounts).
- Touch a DreamHost email account.
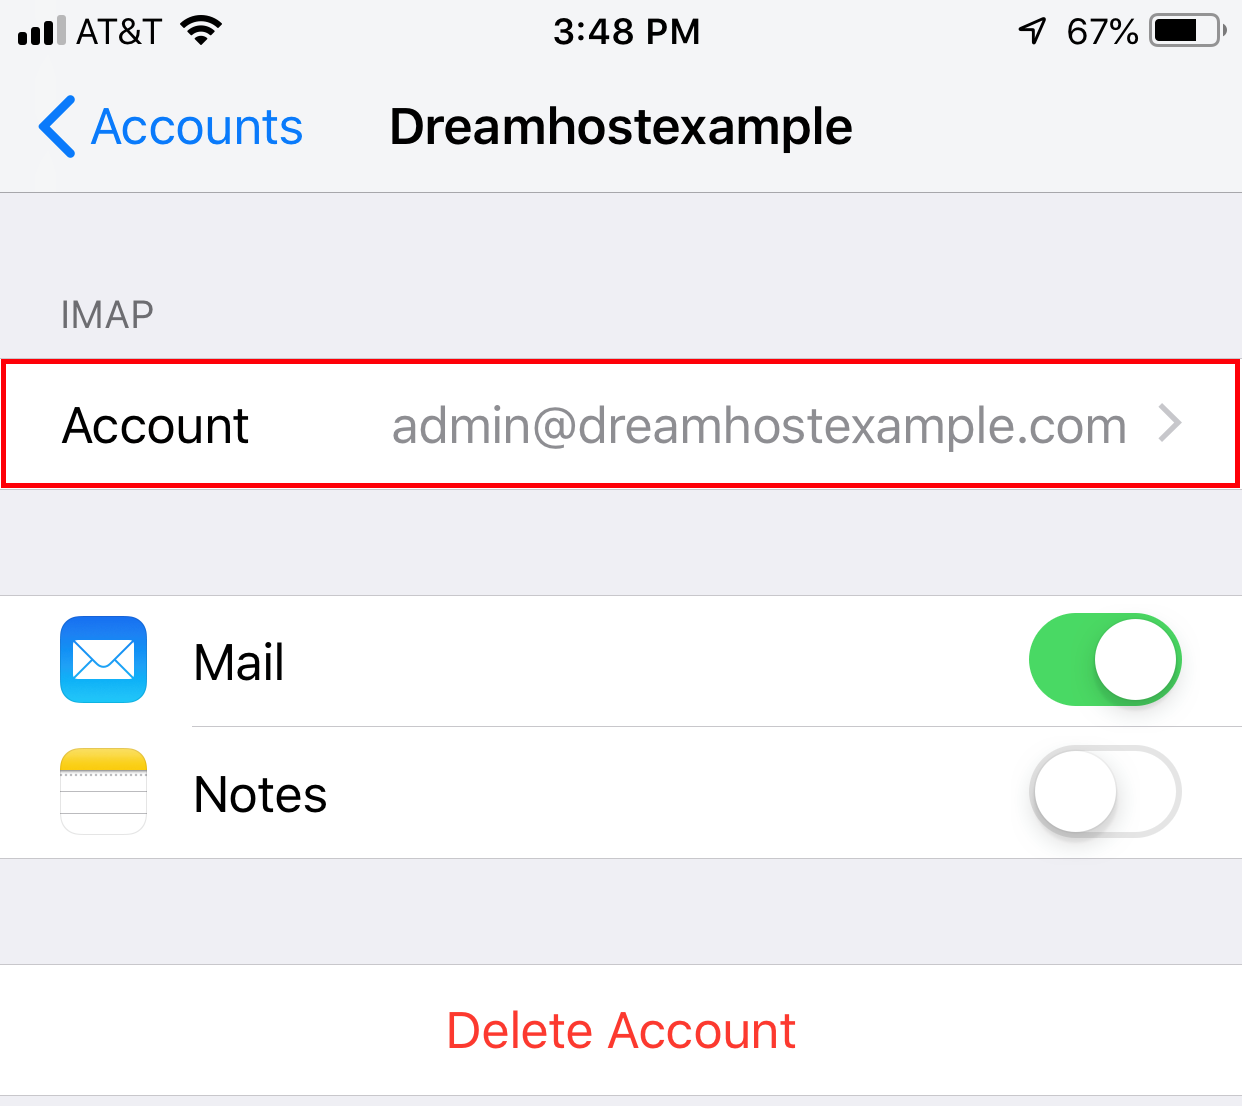
- Tap ‘Account’ to see basic settings.
- Tap ‘Advanced’ towards the bottom.
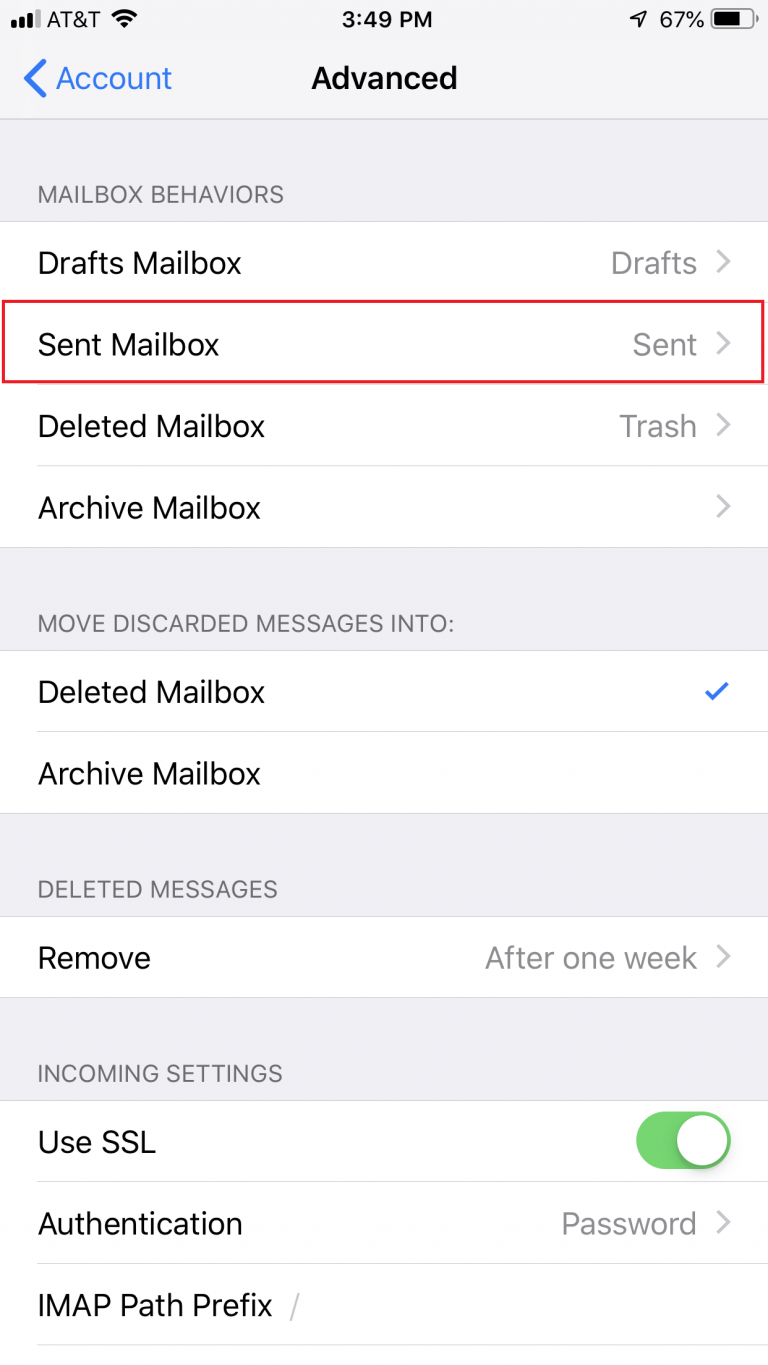
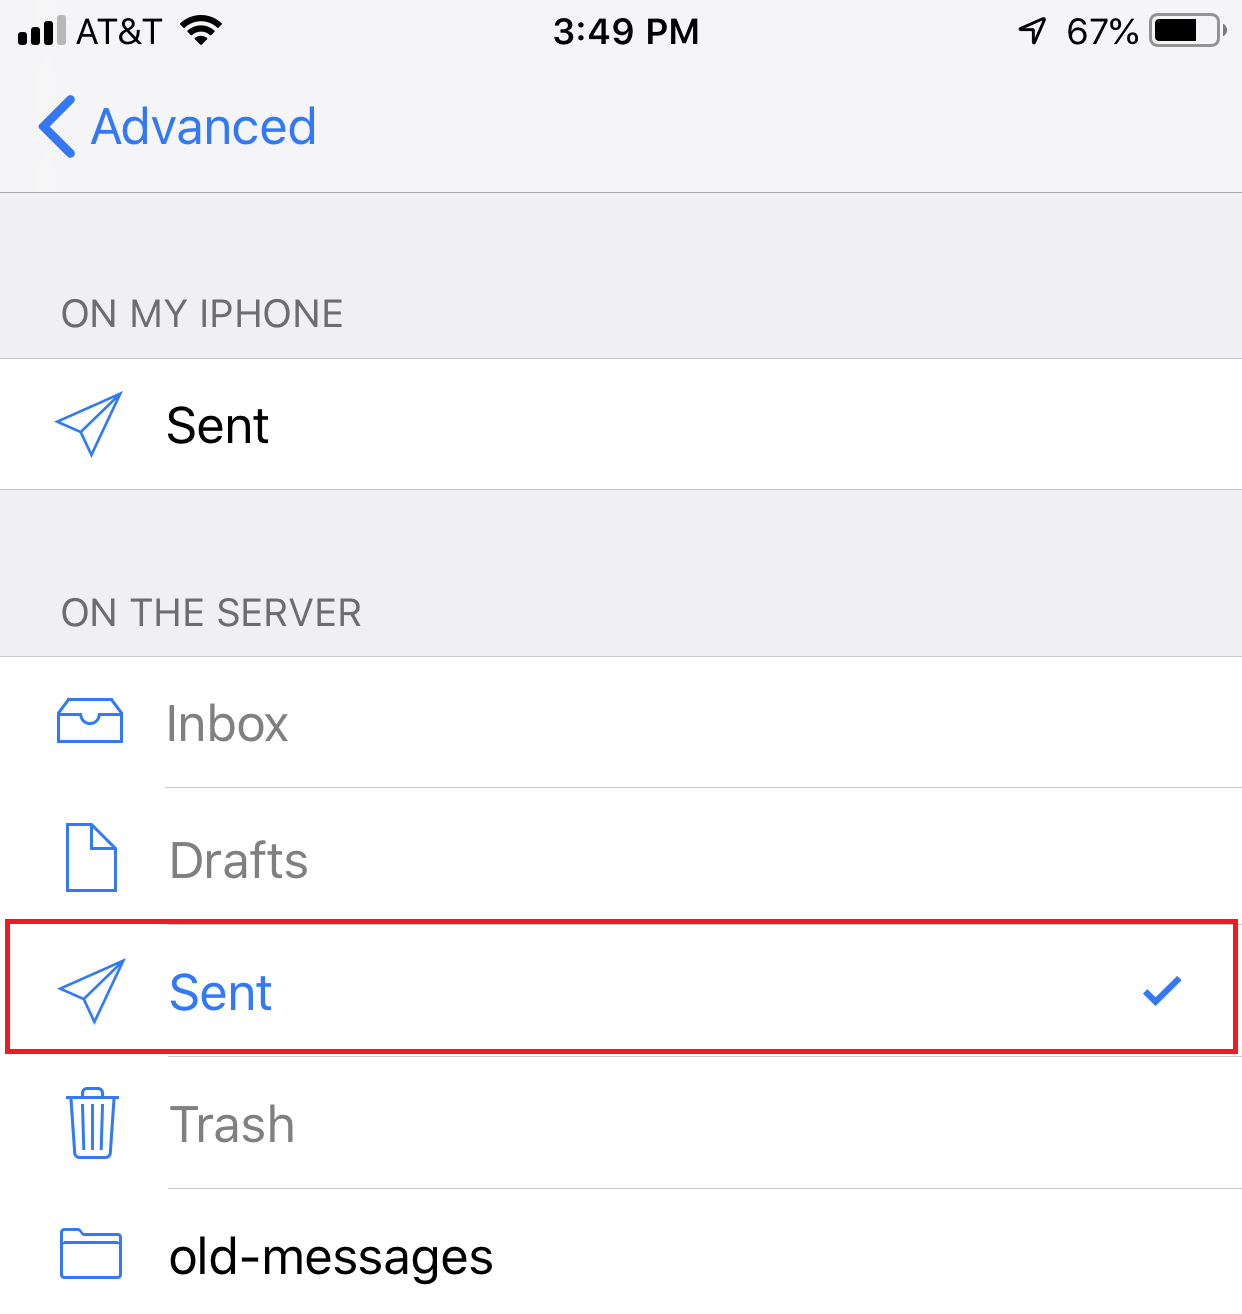
6. Tap on ‘Sent Messages’ in the section.
7. When done, tap on ‘Advanced> Account> Done’ at the top.
Your sent messages now appear on the mail server instead of in your iPhone folder.
Push and retrieve settings
‘Push’ is not available with a DreamHost email account. You must use ‘Fetch’ or ‘Manual’. See the following article for more details:
Troubleshooting
I’ve added a DreamHost email account to my iPhone, but it can’t connect
iPhone automatically detects the rest of the settings and connects to your mailbox. However, in some cases, it may not connect correctly the first few times. You may need to tap the Connect button several times before it connects successfully. This is a known issue within the Mail program on the iPhone that can cause this behavior.
You can make the following changes in the Advanced section if you have any sync issues:
- You must set the IMAP path prefix to INBOX (all caps) for IMAP clients to work properly with DreamHost servers. Most desktop email clients work normally, but instead display all folders in the Inbox as subfolders instead of next to them.
- For sent messages, tap ‘Sent Mailbox’ in the ‘MAIL BEHAVIORS’ section, and then tap the folder you want to use for sent messages (in the ‘ON SERVER’ section). The current election has a paper airplane next to it.
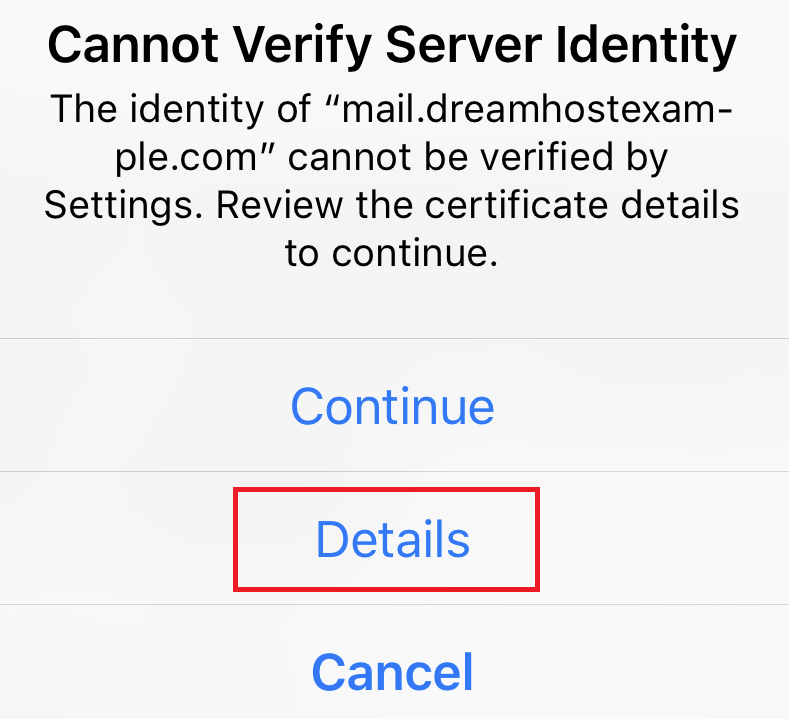
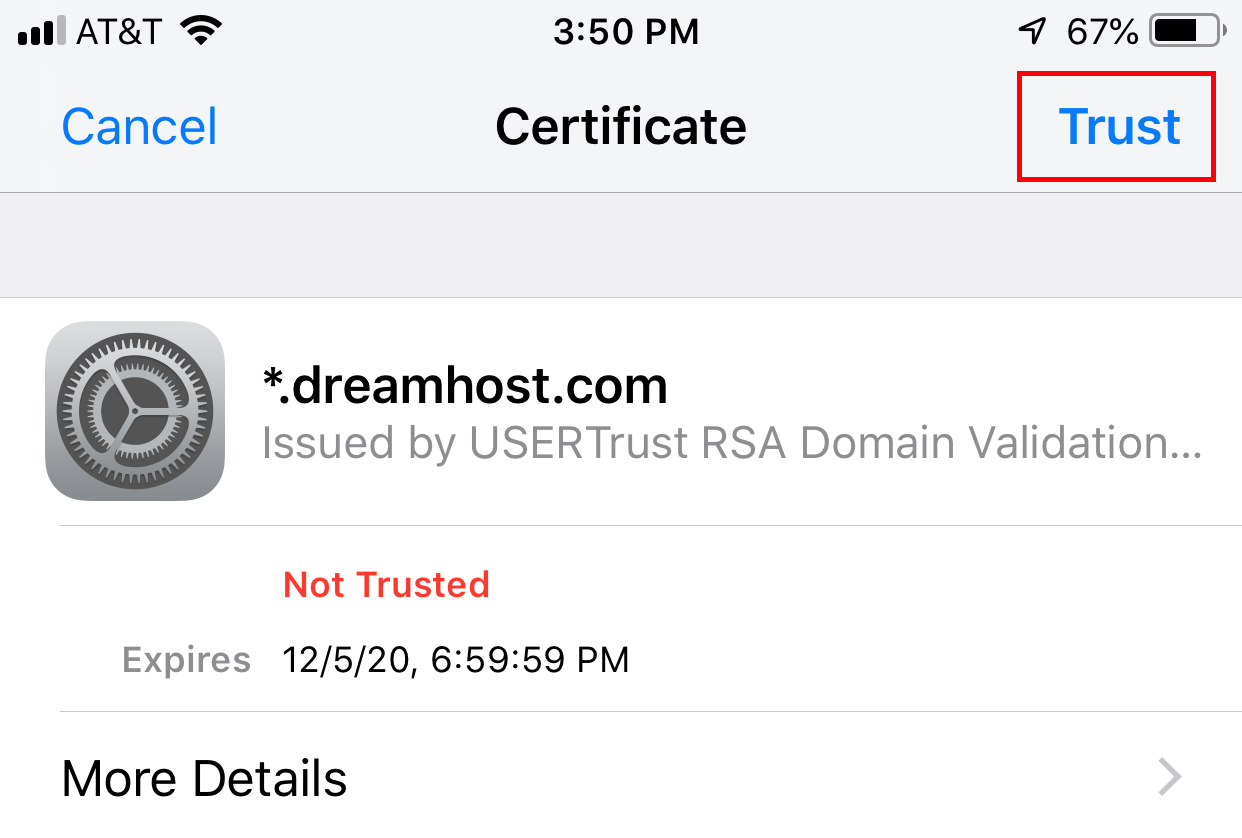
I get the message ‘Unable to verify the identity of the server’
If you enter the host name of your website (mail.example.com) instead of the name of your mail server (imap .dreamhost.com or pop .dreamhost .com), the following message will appear after connecting